Unlocking the Secrets to Perfect Homemade Pizza Dough
There's an undeniable magic to a truly great pizza – that perfect balance of a crispy, chewy crust, rich sauce, and molten cheese. While ordering delivery is always an option, imagine replicating the authentic Italian pizzeria experience right in your own kitchen. The secret, as any pizzaiolo will tell you, lies entirely in the dough. Forget dry, stiff, or overly thin bases; we're talking about a
homemade pizza dough that boasts puffy, airy edges, a delightfully chewy interior, and enough structural integrity to hold your favourite toppings without collapsing. This isn't just another
pizza dough recipe; it's the gateway to transforming your home-baked pizzas into culinary masterpieces.
The journey to an exceptional homemade pizza starts with a dough that delivers on every front. Picture this: a crust with a beautifully golden exterior that offers a satisfying crunch, yielding to an interior that is moist, soft, and riddled with irregular air pockets, much like artisan bread. This dough is designed to be easily picked up, providing a sturdy yet pliable base – a far cry from the cracker-thin, rigid crusts that often disappoint. What truly sets this
pizza dough apart is its incredible ease of preparation, requiring as little as 5 minutes of hand-kneading or a mere 40 seconds in a food processor. Plus, for those who love to plan ahead, the dough can be made up to five days in advance and even pre-portioned into individual pizza balls, ready to use for hours, ensuring spontaneous pizza nights are always a possibility.
Essential Ingredients for Your Signature Pizza Dough
Crafting the perfect
pizza dough doesn't require a long list of exotic items, but understanding the role of each ingredient is key to achieving that desired Italian pizzeria crust. Each component plays a vital part in the texture, flavour, and rise of your dough.
- Yeast: The Leavening Powerhouse
For convenience and speed, instant or rapid-rise yeast is highly recommended. Unlike active dry yeast, which typically needs to be dissolved in warm water and proofed, instant yeast can be mixed directly with the dry ingredients. This saves a step and ensures a faster rise. However, if active dry yeast is all you have, don't fret! Simply dissolve it in a portion of your warm water (around 105-115°F / 40-46°C) with a pinch of sugar for 5-10 minutes until foamy before adding it to your flour mixture. A good "bloom" indicates your yeast is active and ready to work its magic.
- Flour: The Foundation of Flavour and Texture
While all-purpose flour will certainly yield a decent pizza dough, the true secret to a chewier crust with those coveted "big holes" lies in using bread flour or dedicated pizza flour. These flours boast a higher protein content, which translates to more gluten development. Gluten is what gives dough its elasticity and structure, allowing it to stretch thin without tearing and create those desirable airy pockets. If you're serious about replicating an authentic Italian crust, bread flour is a worthwhile investment. However, don't feel compelled to make a special trip if all-purpose is what you have on hand; simply plan to pick up bread flour for your next batch.
- Sugar: The Dough's Best Friend
A small amount of sugar serves two critical functions in your pizza dough. Firstly, it acts as food for the yeast, helping to activate it and encourage a robust rise. Secondly, it contributes to the beautiful golden-brown colour of the crust during baking, adding a subtle sweetness that balances the savoury toppings.
- Salt: Essential for Flavour and Control
Never underestimate the importance of salt in dough. It not only enhances the flavour of the crust, preventing it from tasting bland, but it also helps to control the yeast's activity, slowing down fermentation slightly to improve the dough's structure and texture. Ensure salt is distributed evenly and not directly touching the yeast at the beginning, as high concentrations can inhibit yeast activity.
- Warm Water: The Catalyst for Yeast
Yeast thrives in warmth, and using warm water (lukewarm, not hot, usually around 100-110°F / 38-43°C) is crucial for jump-starting its activity. This warmth helps the yeast activate quickly, leading to a faster and more efficient rise. Too hot, and you risk killing the yeast; too cold, and it will be sluggish.
- Olive Oil: The Home Oven Secret Weapon
This ingredient is particularly vital for pizza dough baked in standard home ovens. Traditional Neapolitan pizza dough often omits oil, but those pizzas cook in searing hot wood-fired ovens (up to 400°C/750°F) in just a few minutes. Home ovens, which typically max out at around 275°C/530°F, require longer baking times. Without olive oil, the crust in a home oven can dry out and become tough. Olive oil helps keep the crust tender, moist, and pliable on the inside, preventing it from becoming stiff and dry during the extended bake.
Crafting Your Dough: A Step-by-Step Guide with Time-Saving Hacks
The beauty of this
pizza dough recipe lies in its simplicity and adaptability, fitting into even the busiest schedules. Whether you prefer to get hands-on or let machinery do the heavy lifting, the process is straightforward and rewarding.
- The Initial Mix: Combining Dry and Wet
Begin by combining your dry ingredients: flour, yeast, sugar, and salt in a large bowl. Give them a quick whisk to ensure even distribution. Next, pour in the warm water and olive oil. Stir with a wooden spoon or your hands until the mixture comes together into a shaggy, rough dough. It should pull away from the sides of the bowl, leaving it relatively clean.
- Kneading: Choose Your Weapon!
This is where you decide your preferred method of developing that crucial gluten structure.
- Hand Kneading: Scrape the rough dough out onto a lightly floured surface. Knead for approximately 5 minutes. The motion involves pushing the dough away from you with the heel of your hand, folding it back, and rotating it. Repeat this process until the dough transforms from shaggy and sticky to smooth, elastic, and supple.
- Stand Mixer: If you have a stand mixer, attach the dough hook. Knead the dough for about 3 minutes on medium-low speed. The dough will become smooth and elastic, clinging to the hook but clearing the sides of the bowl.
- Food Processor: For the ultimate time-saver, a food processor fitted with the dough blade attachment is a game-changer. Simply combine all ingredients (dry first, then wet) and process for an astonishing 40 seconds. The dough will quickly form a ball and be perfectly kneaded. For a deeper dive into the mechanics of kneading with various tools and mastering the quick methods, check out our guide on Fast & Foolproof: Get Bakery-Quality Pizza Dough in Minutes. Or, if you're exploring the versatility of kitchen equipment, read Easy Pizza Dough: Knead by Hand, Mixer, or Food Processor!
- The First Rise (Bulk Fermentation): Letting it Proof
Lightly oil a clean bowl, place your kneaded pizza dough in it, and turn it once to coat. Cover the bowl tightly with plastic wrap or a damp tea towel. Find a warm spot in your kitchen (ideally around 70-75°F / 21-24°C) and let the dough rise until it has roughly doubled in size. This usually takes 1-2 hours, depending on the ambient temperature and the activity of your yeast. This initial rise allows the flavours to develop and the gluten to relax.
- Shaping and Second Rise (Optional/Individual Balls): Prep for Perfection
Once doubled, gently punch down the dough to release the air. Turn it out onto a lightly floured surface and divide it into individual pizza balls (typically 2-3 depending on desired pizza size). Gently form each piece into a smooth ball. At this stage, you have options:
- Immediate Use: Cover the individual balls and let them rest for another 30-60 minutes at room temperature, which will make them easier to stretch.
- Make Ahead: Place the dough balls in individual airtight containers or freezer bags (lightly oiled) and refrigerate for up to 5 days. This slow fermentation in the fridge develops even deeper flavour.
- Freezing: For long-term storage, you can also freeze well-wrapped dough balls for up to 3 months. Thaw overnight in the fridge before use.
Tips for Elevating Your Homemade Pizza Experience
Mastering
pizza dough is the first step; perfecting the entire pizza-making process ensures restaurant-quality results every time.
- Maximize Oven Heat: Your home oven is your best friend. Preheat it to its highest possible temperature (often 250-275°C / 475-530°F) for at least 30-60 minutes before baking. Using a pizza stone or steel, preheated inside the oven, will provide an intensely hot surface that mimics a traditional pizza oven, giving you a wonderfully crispy crust.
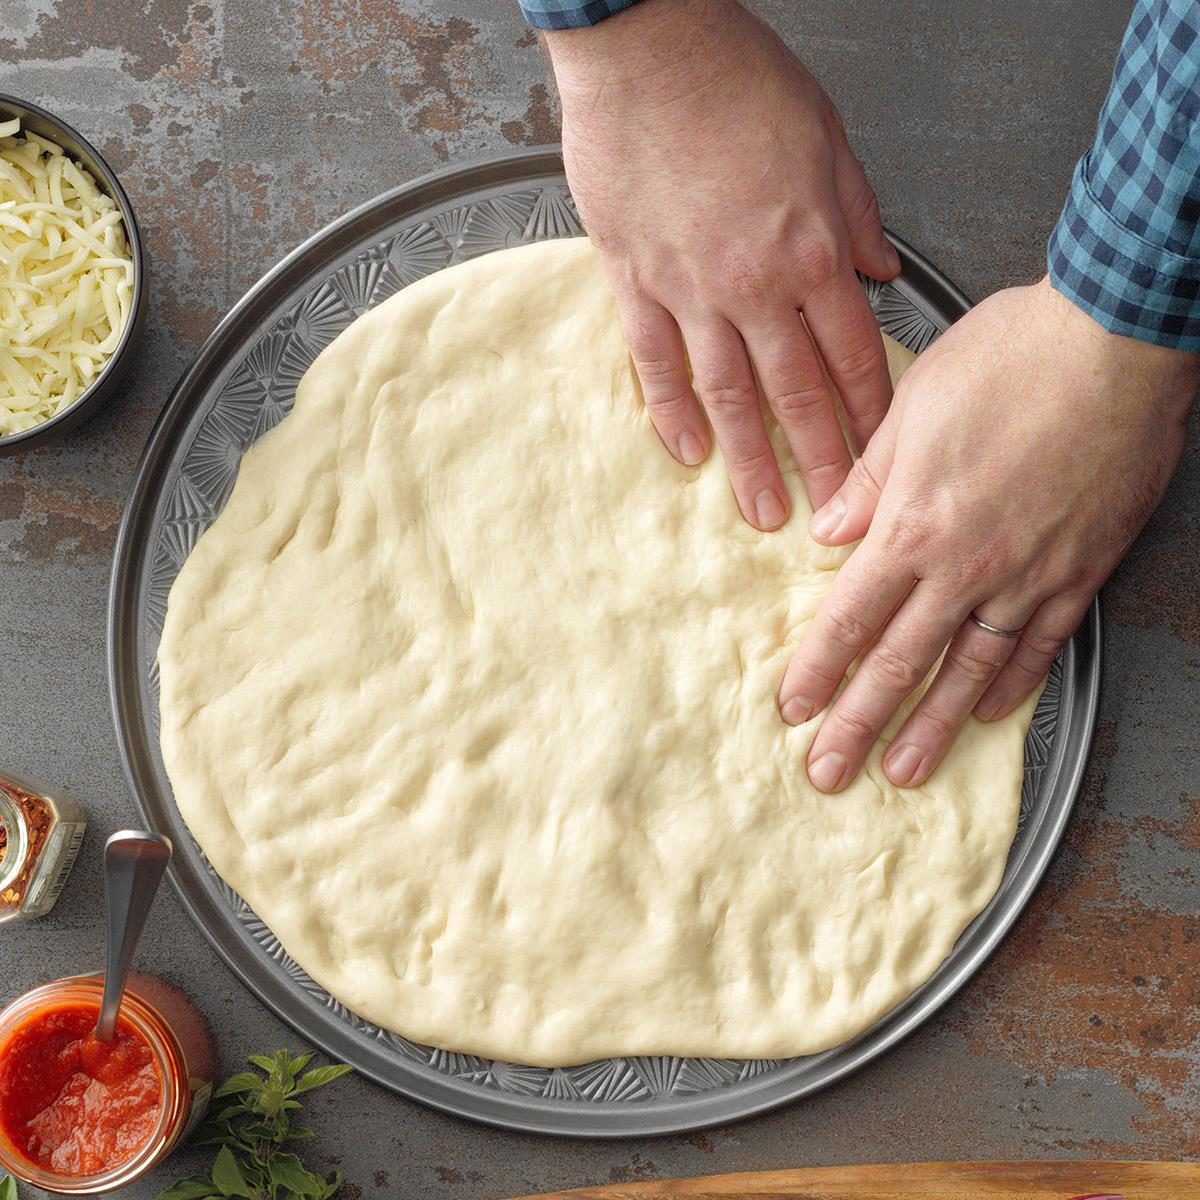
- Gentle Dough Handling: When it's time to stretch your dough, be gentle. Avoid using a rolling pin, which can press out too much air and result in a dense crust. Instead, use your hands, starting from the center and working outwards, leaving the edges slightly thicker for that signature puffy rim.
- Don't Overload: One of the biggest mistakes home pizza makers make is piling on too many toppings. Less is often more. Overloading can lead to a soggy base and uneven cooking. Stick to a light layer of sauce, cheese, and a few key toppings to let the crust shine.
- Proper Proofing Check: To tell if your dough is perfectly proofed before stretching, gently press a floured finger into it. If the indentation springs back slowly, it's ready. If it springs back immediately, it needs more time. If it collapses, it's over-proofed.
- Pre-bake for Crispier Crusts (Optional): For certain heavily topped pizzas or if you prefer an extra-crispy base, you can par-bake the plain dough for 5-7 minutes before adding sauce and toppings.
Conclusion
Creating exceptional
pizza dough at home is not just achievable; it's a deeply satisfying culinary journey. By understanding the simple science behind a few key ingredients and embracing versatile kneading methods, you can consistently produce a crust that rivals your favourite Italian pizzerias. From its perfectly puffy, chewy texture to its robust flavour and impressive structural integrity, this
pizza dough recipe provides the ultimate foundation for countless delicious homemade pizzas. So, ditch the delivery menu, roll up your sleeves, and prepare to delight your taste buds and impress your family and friends with the incredible taste of truly authentic, homemade pizza. The best part? It's much easier than you think!